

Typically I send out your basic holiday photo Christmas cards. Don’t get me wrong, I LOVE sending those AND receiving/displaying them from friends. However, this year I thought it would be fun to involve my kids in the process and turn it into anothier DIY holiday craft/activity (something I am so desperate for these days, especially with COVID-19 ramping up and everything shutting down again).
I perused the internet for easy, homemade card tutorials but couldn’t find one that was right for our family. Then, when heading out to the garage to grab some juice boxes, I nearly tripped over a bag of potatoes and that is when it hit me….potato stamp cards!
If you don’t know what potato stamps are, it is time to learn. Below are instructions to make your own potato stamp holiday cards.
Supplies

I had a lot of the supplies listed below lying around my house, and borrowed a few from my mother’s scrapbook room. However, all of these items are available at www.walmart.com so you can have them sent straight to your door. I will link them in the supply list below.
- Russet potatoes
- Knife
- Acrylic paint in assorted colors
- Blank greeting cards & envelopes
- Glue
- Glitter
- Beads/sequins/stickers
- Holiday Greeting rubber stamp(s)
- Paint brushes
- Paper plates
- Ink pads
- Construction Paper
Step One

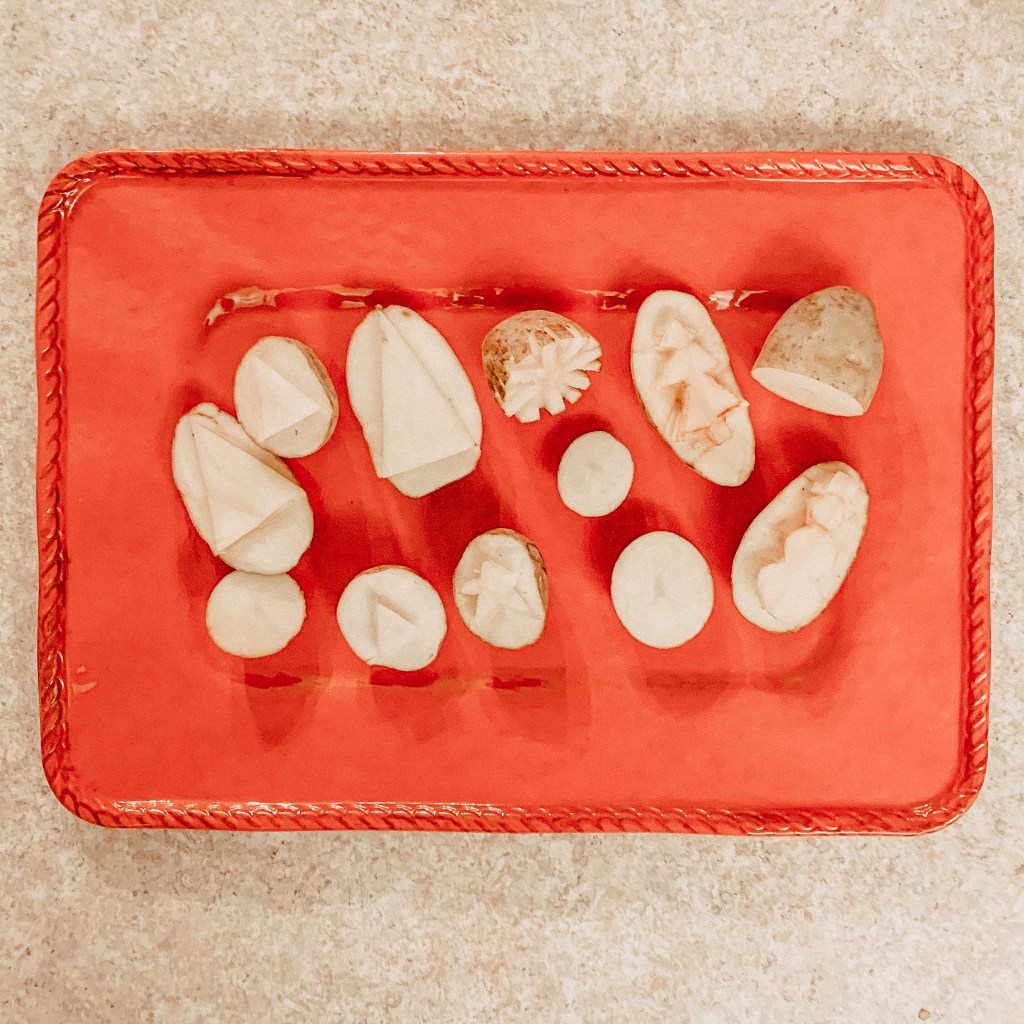
Cut your potatoes in half. Depending on the type of shapes you plan to make, you may want to cut some in half lengthwise and some from the center.
Using your knife, lightly carve an outline of your stamp shape. I freehanded mine (and I am not artist). If you don’t want to freehand, you could trace shapes or use a cookie cutter if your potatoes are large.
Once you have your shape outlined, carve out the parts of the potato that are on the outside of the shape. When complete, you should have a raised shape on the potato halve similar to a rubber stamp!
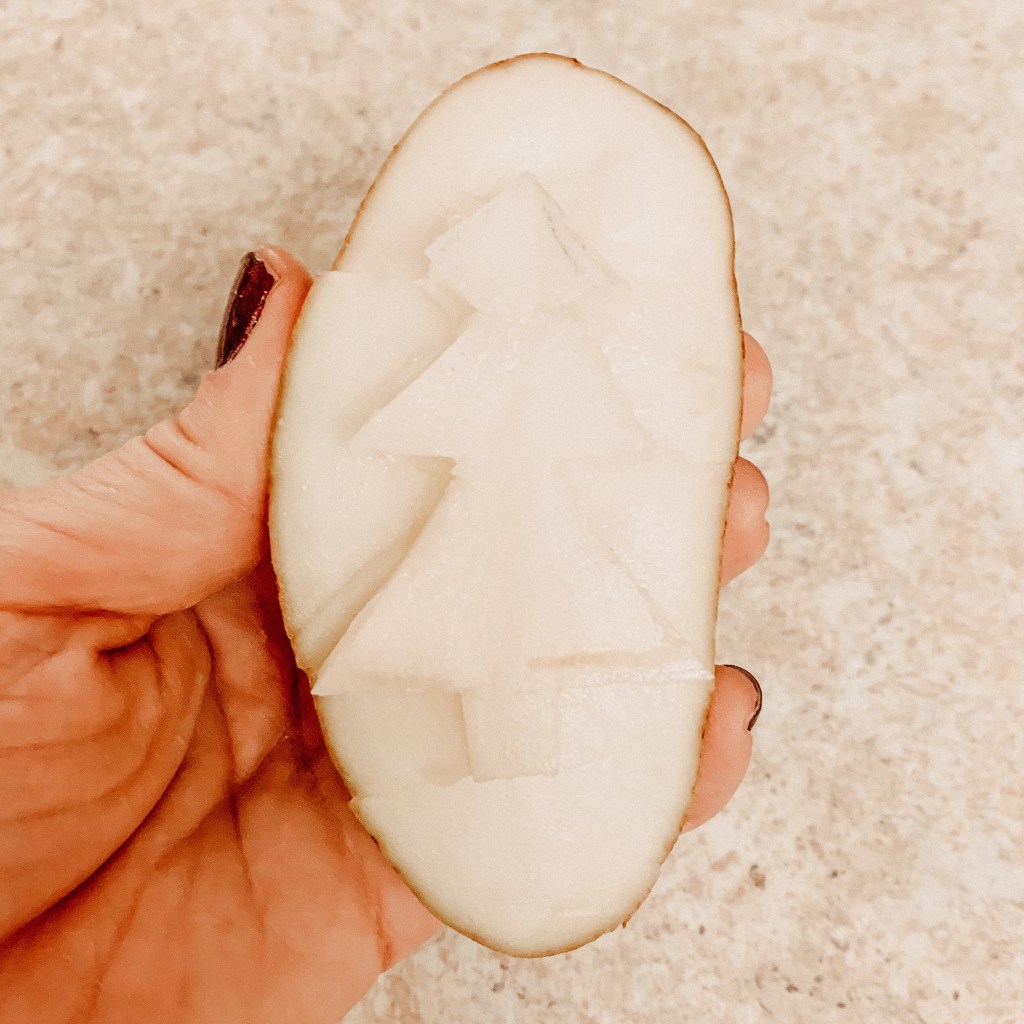
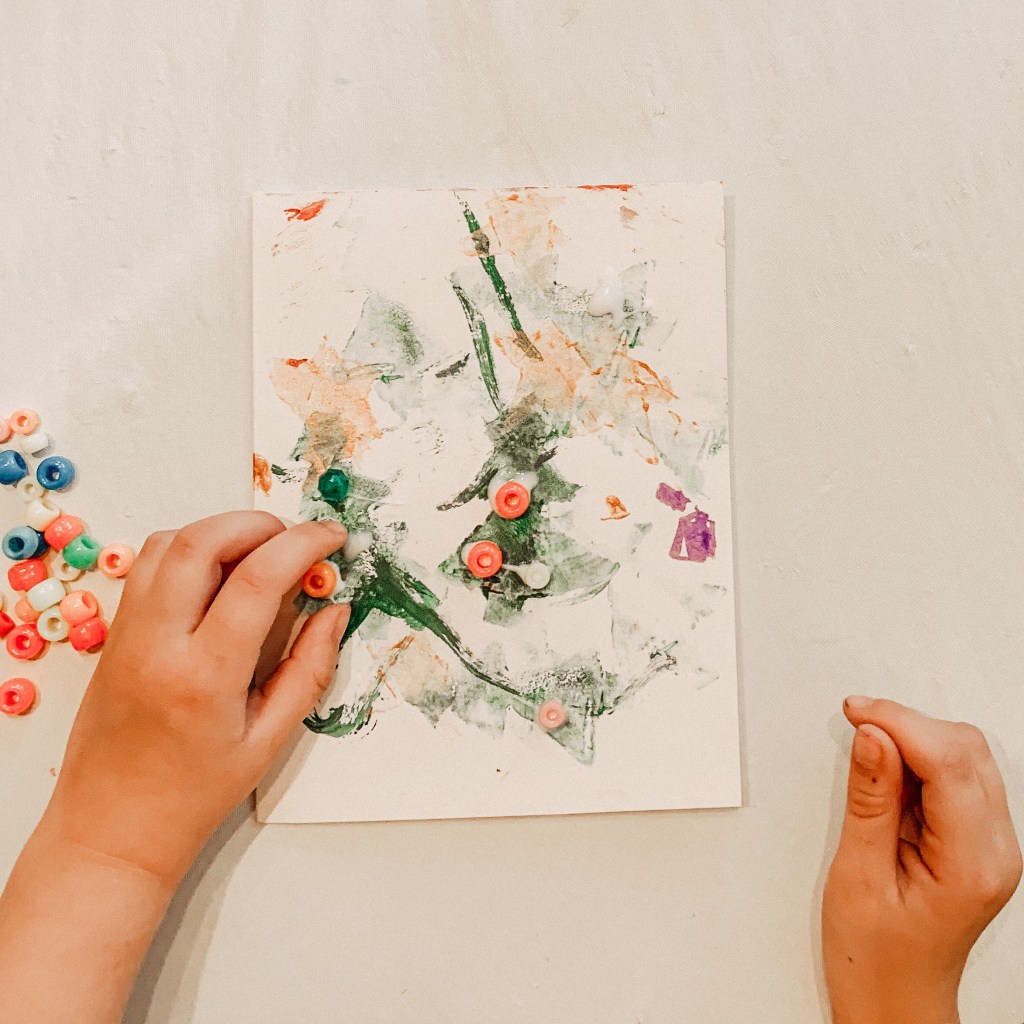
I created simple shapes such as triangles for trees, circles to build a snowman, a star, a built snowman with a hat, a Christmas tree and a snowflake.
Step Two
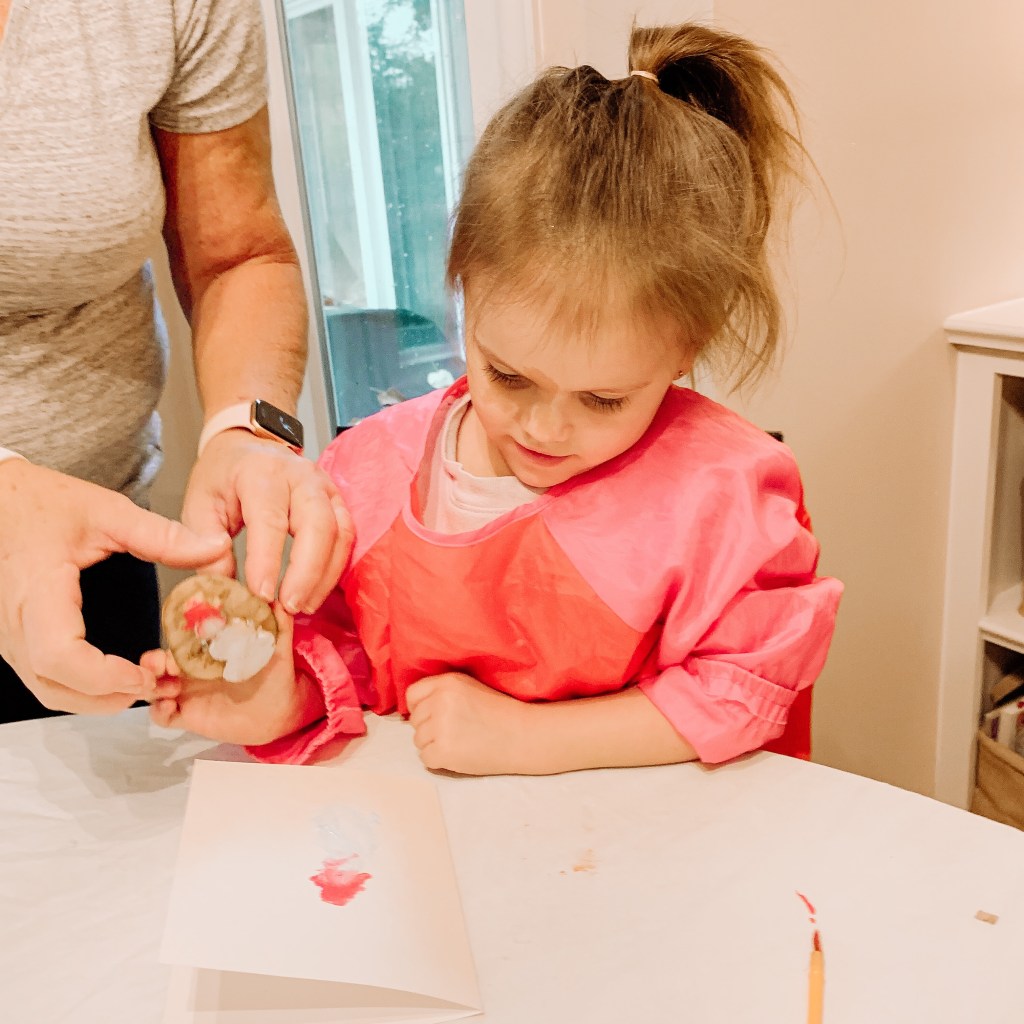
Cover your workspace in preparation for painting. An old table cloth or newspaper will do just fine. This can get messy! If letting your kids participate, I suggest smocks.
Step Three

Pour paint onto your paper plate. Paint the potato stamp with the color(s) of your choice. Be sure to only paint the raised part of the stamp and use a generous amount of paint.

Step Four
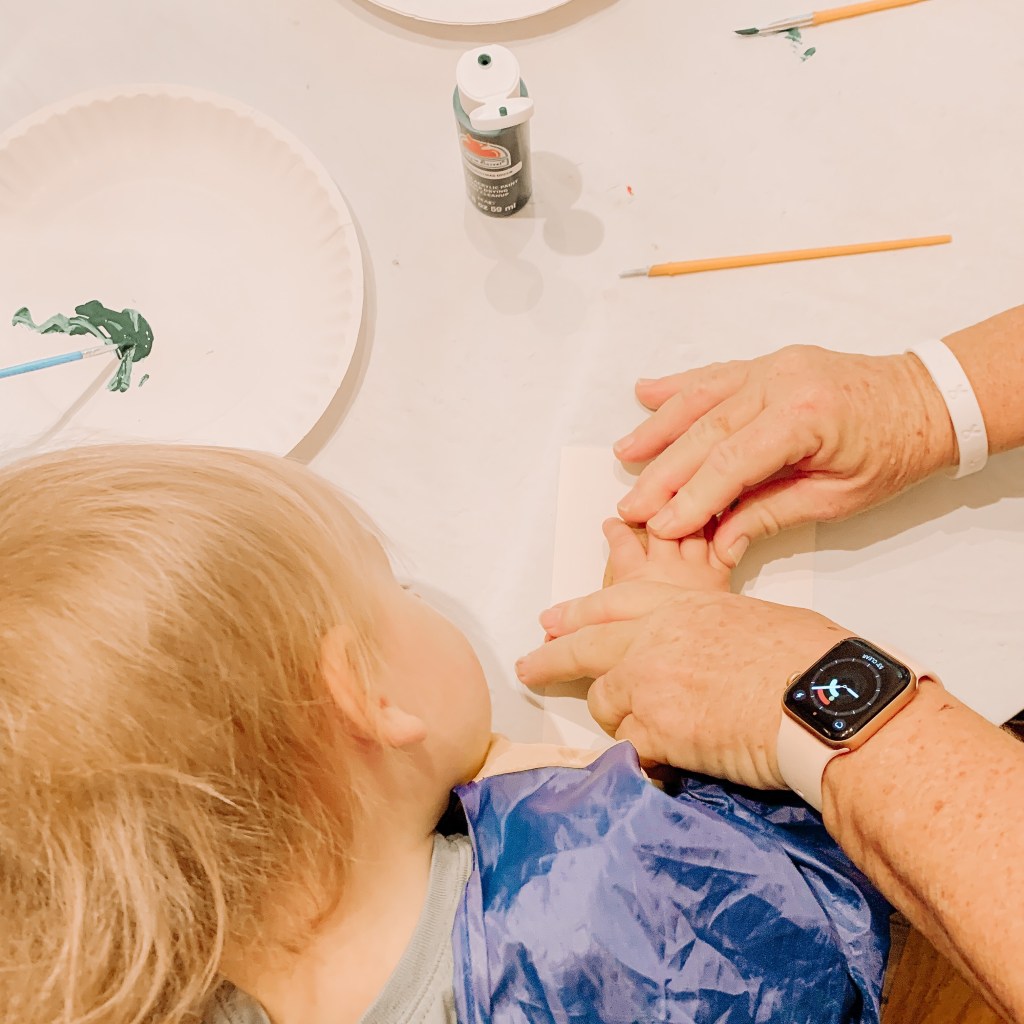
Carefully press the potato stamp onto your blank greeting card and then remove it. You should now have a beautiful imprint on your card. Repeat this step with your potato stamps and cards until you are happy with them. When finished stamping, allow the cards to dry for at least two hours.
Step Five
Once dry, add embellishments to your cards using glue and beads, glitter, sequins, etc. We glued beads onto our trees for ornaments. Construction paper can be used to create tree trunks, stars, hats for snowmen and more. And glitter makes great sparkly snowflakes or letters. Let dry for another hour or so.
Step Six
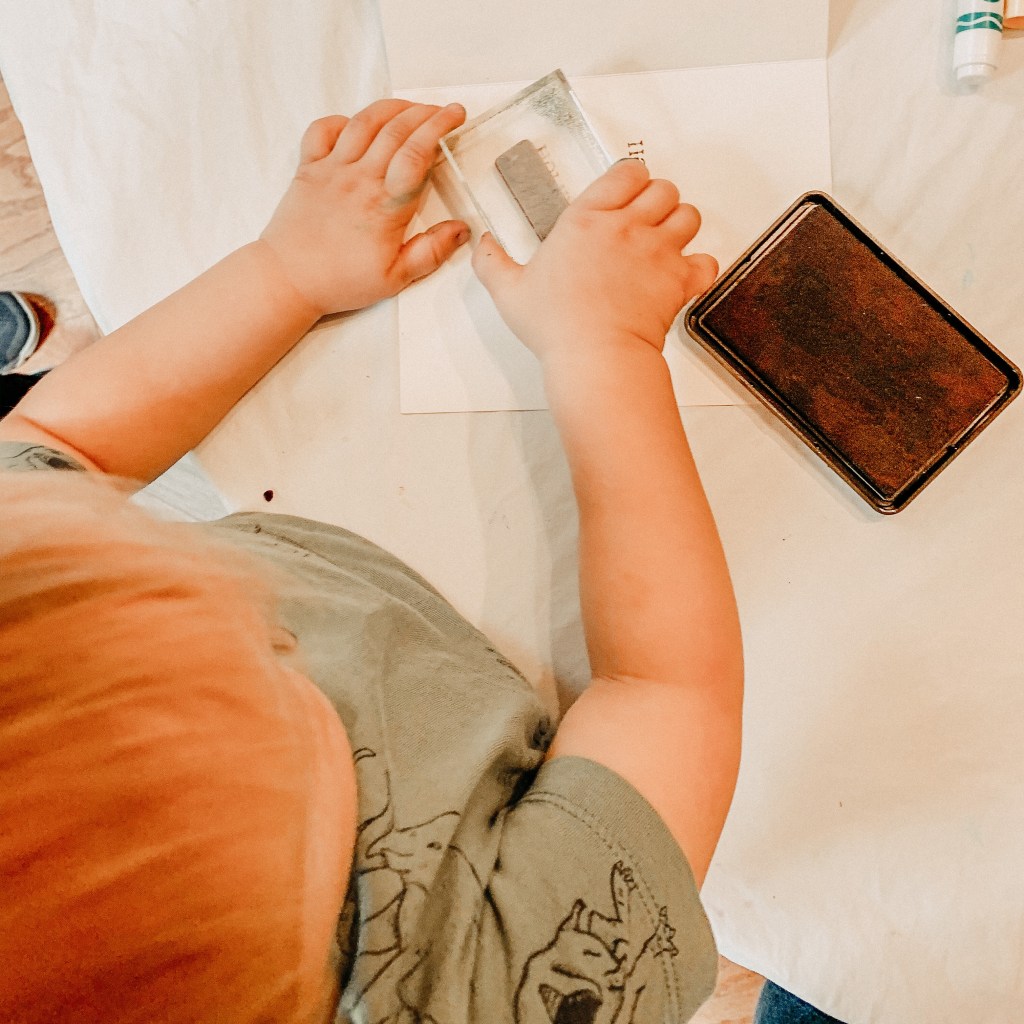
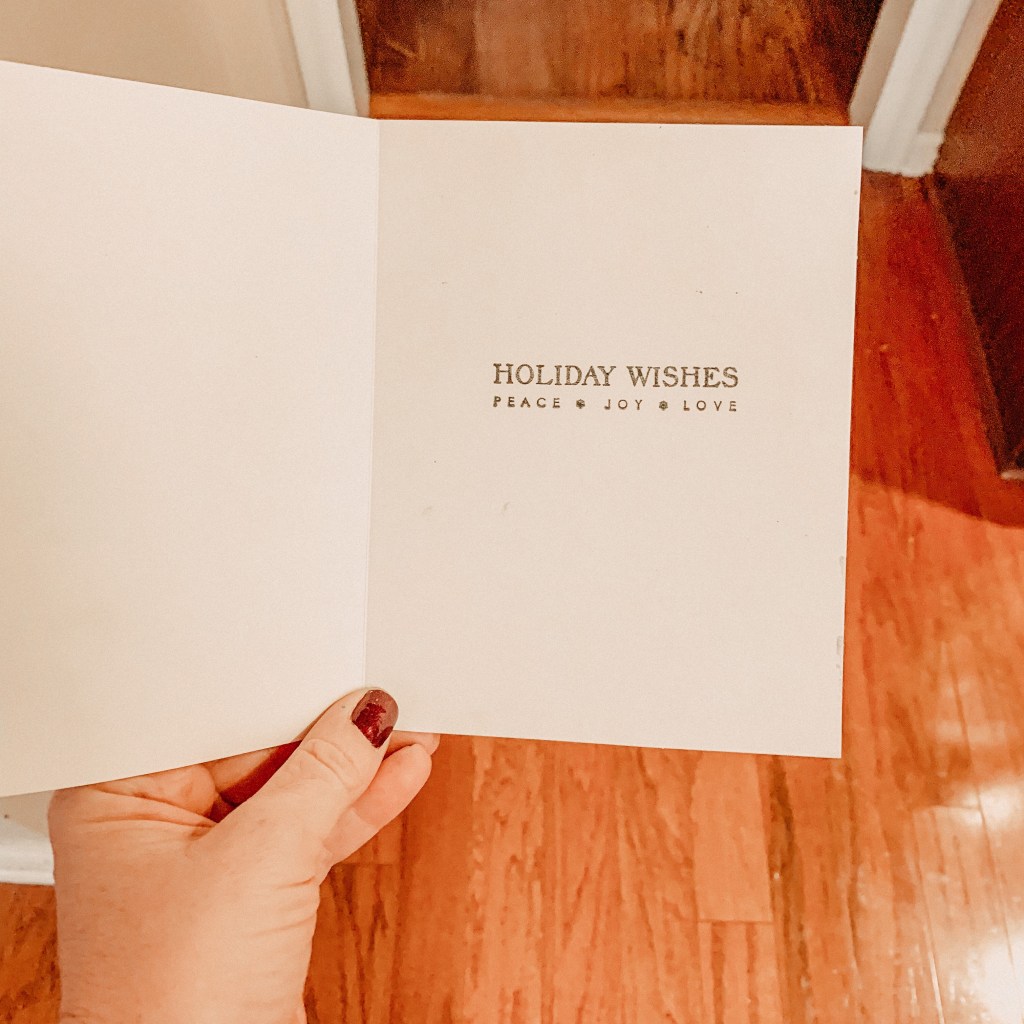
Using your rubber stamp and ink pad, stamp the inside of your greeting card to add the finishing touch! Your cards are now ready for a personal message and signature. Your friends and family are sure to love the personal touch of your cards this year.
Happy Holidays!


Leave a comment